


In the ever-evolving world of electronics and CNC (Computer Numerical Control) machining, understanding the tools and technologies at your disposal can significantly enhance your projects and workflows. Whether you’re a hobbyist or a professional, mastering the integration and application of various controllers and interfaces is crucial. This article will guide you through four essential topics: Arduino driving relay, Mach3 tutorial CNC, PoKeys tutorial, and Mach4 motion controller. Each section is designed to provide you with a comprehensive understanding of these components, how they interconnect, and how you can leverage them to optimize your CNC and electronics projects.
We will start by exploring how to use Arduino to drive a relay, a fundamental skill for controlling higher power devices with microcontrollers. Next, we will delve into a detailed Mach3 tutorial for CNC, covering the basics of this popular control software. Following this, we’ll provide an in-depth PoKeys tutorial, showing you how this versatile device can streamline your control systems. Finally, we’ll look at the Mach4 motion controller, the advanced successor to Mach3, offering enhanced features and capabilities. By the end of this article, you’ll have a solid foundation in these critical areas, empowering you to tackle more complex and efficient projects.
Arduino Driving Relay
Arduino is a powerful and versatile platform for developing electronic projects, and one of its many applications includes driving relays. Relays are essential for controlling higher power devices that cannot be directly managed by Arduino’s digital pins due to their limited current and voltage capabilities. Understanding how to use an Arduino to drive a relay can open up a wide range of possibilities for automation and control projects.
To begin with, a relay is an electromechanical switch that allows a low power signal from the Arduino to control a high power circuit. This is crucial for tasks such as turning on motors, lights, or other devices that require more power than the Arduino can supply. The typical setup involves an Arduino, a relay module, and the device you want to control.
First, connect the relay module to the Arduino. This usually involves connecting the VCC and GND pins of the relay module to the 5V and GND pins of the Arduino. The control pin of the relay module, often labeled IN, connects to one of the Arduino’s digital output pins. In your code, you’ll need to set this pin as an output and use the digitalWrite function to control the relay. For instance, writing a HIGH signal to the pin will activate the relay, closing the circuit and allowing current to flow to the connected device.
Here’s a simple example code to illustrate:int relayPin = 7; // Pin connected to the relayvoid setup() {
pinMode(relayPin, OUTPUT); // Set relay pin as an output
}
void loop() {
digitalWrite(relayPin, HIGH); // Turn relay on
delay(1000); // Wait for a second
digitalWrite(relayPin, LOW); // Turn relay off
delay(1000); // Wait for a second
}
In this example, the relay is turned on and off every second, controlling whatever device is connected to the relay. This basic setup can be expanded to include multiple relays, sensors, and more complex control logic.
Safety is paramount when dealing with relays and high power devices. Ensure that your relay module is rated for the voltage and current of the device you are controlling. Additionally, always isolate high voltage components from the low voltage Arduino circuitry to prevent damage and potential hazards.
By mastering Arduino driving relay, you unlock the potential to create sophisticated automation systems, from simple light switches to complex home automation setups. This foundational skill is a gateway to exploring more advanced electronics and control projects, integrating seamlessly with CNC and other systems.
Mach3 Tutorial CNC
Mach3 is one of the most popular software solutions for CNC (Computer Numerical Control) machines, offering robust capabilities and a user-friendly interface. Whether you’re setting up a CNC router, milling machine, or plasma cutter, understanding how to use Mach3 is crucial for precise and efficient operation. This Mach3 tutorial for CNC will guide you through the basics, helping you get started with this powerful tool.
First, let’s cover the installation process. Mach3 can be downloaded from the official website and installed on a Windows PC. Once installed, you’ll need to configure it to communicate with your CNC machine. This typically involves setting up the parallel port or using a USB motion controller. Ensure your CNC machine is compatible with Mach3 and that all necessary drivers are installed.
Once Mach3 is installed, the next step is to configure the software settings to match your CNC machine’s specifications. Open Mach3 and go to the “Config” menu, where you can set up the motor tuning, ports, and pins configuration. Motor tuning is essential for defining the steps per unit, velocity, and acceleration of each axis. Proper motor tuning ensures that your CNC machine moves accurately and smoothly. The ports and pins configuration allows Mach3 to communicate with your machine’s controller, specifying which pins on your breakout board correspond to which machine functions.
A critical aspect of using Mach3 is understanding the G-code, the language used to control CNC machines. Mach3 can read and execute G-code files generated by various CAM (Computer-Aided Manufacturing) software. Before running a job, load the G-code file into Mach3 by clicking “File” and then “Load G-code”. The G-code will appear in the toolpath display, allowing you to visualize the cutting path and make any necessary adjustments.

To run your first CNC job with Mach3, follow these steps:
- Home the Machine: Ensure your CNC machine is at its home position. This is the reference point from which all movements are calculated. Use the “Ref All Home” button in Mach3 to home all axes.
- Load the G-code: Open your G-code file and load it into Mach3. Review the toolpath to ensure it matches your expectations.
- Set the Origin: Position your machine at the starting point of the job and set the origin (zero point) for all axes. This is typically done using the “Zero X”, “Zero Y”, and “Zero Z” buttons.
- Run the Job: Click the “Cycle Start” button to begin the job. Monitor the machine closely, especially during the first run, to ensure everything is working correctly.
Mach3 also offers a wide range of customization options, allowing you to tailor the software to your specific needs. You can create custom macros, set up automated tool changes, and integrate additional hardware such as touch probes and tool height setters.
By mastering this Mach3 tutorial for CNC, you gain the skills needed to operate your CNC machine effectively. The knowledge of configuring Mach3, understanding G-code, and running jobs will empower you to tackle a variety of projects with precision and confidence. This foundational expertise is essential for anyone looking to delve deeper into CNC machining and automation.
PoKeys Tutorial
PoKeys devices are highly versatile and powerful tools for interfacing various inputs and outputs with your computer, making them perfect for CNC and other automation projects. This PoKeys tutorial will guide you through the basics of setting up and using a PoKeys device, helping you leverage its capabilities for your specific needs.
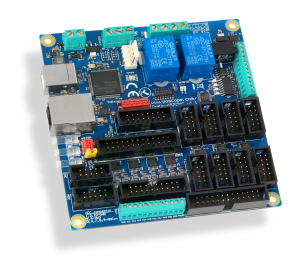
PoKeys devices, such as the PoKeys57U or PoKeys57E, are designed to connect to your computer via USB or Ethernet, providing a plethora of I/O options. These devices can handle digital and analog inputs and outputs, PWM, encoders, and more. They are particularly useful for adding extra inputs and outputs to your CNC machine or for creating custom control panels.
Setting Up PoKeys
To begin, you’ll need to download the PoKeys configuration software from the official website. Install the software and connect your PoKeys device to your computer. If you’re using a PoKeys57U, connect via USB. For a PoKeys57E, use an Ethernet connection.
Once connected, launch the PoKeys configuration software. The software should automatically detect your device. If not, you may need to manually select the correct COM port or IP address. After detection, you can start configuring the device’s inputs and outputs.
Configuring Inputs and Outputs
In the configuration software, you’ll find a graphical interface that allows you to map the pins of the PoKeys device to various functions. For digital inputs, select the pin you want to use and assign it as an input. Similarly, for digital outputs, select the pin and assign it as an output. You can also configure analog inputs by selecting the appropriate pins and setting their modes to analog.
For instance, if you want to use a pin as a digital input to read a switch, you would configure that pin as an input in the software. You can then create a simple program or script to read the state of the switch and perform actions based on its state. Here’s a basic example using a PoKeys57U:// Pseudo-code to read digital input
int switchPin = 1; // Assign pin number
int switchState = 0;void setup() {
PoKeys.setPinMode(switchPin, INPUT); // Set pin as input
}void loop() {
switchState = PoKeys.digitalRead(switchPin); // Read switch state
if (switchState == HIGH) {
// Do something when switch is on
} else {
// Do something when switch is off
}
}
Advanced Features
PoKeys devices offer advanced features such as PWM (Pulse Width Modulation), encoder inputs, and the ability to control stepper motors. These features can be configured through the PoKeys software or programmed using custom scripts. For example, if you want to control the speed of a fan using PWM, you can configure a pin as a PWM output and set the desired duty cycle.
Additionally, PoKeys devices support communication protocols like Modbus, which allows for integration with other industrial equipment and software. This makes PoKeys a powerful tool for building complex automation systems.
Integration with CNC Software
One of the key applications of PoKeys devices is in CNC control. PoKeys devices can be used to expand the I/O capabilities of CNC machines, adding additional inputs for limit switches, control buttons, or even MPG (Manual Pulse Generator) wheels. Many CNC control software packages, including Mach3 and Mach4, support PoKeys devices natively, allowing for seamless integration.
By following this PoKeys tutorial, you can effectively configure and utilize PoKeys devices to enhance your projects. Whether you’re adding extra inputs to your CNC machine, creating custom control panels, or building automation systems, PoKeys offers a versatile and powerful solution. Mastering PoKeys will significantly expand your capabilities and streamline your workflows in CNC and automation projects.
Mach4 Motion Controller
The Mach4 motion controller is the advanced successor to the widely-used Mach3, offering enhanced features, greater flexibility, and improved performance for CNC machine control. Understanding how to set up and use Mach4 can significantly optimize your CNC operations. This tutorial will walk you through the essentials of using the Mach4 motion controller, focusing on its installation, configuration, and key functionalities.
Installation and Initial Setup
To start using Mach4, you need to download the software from the official Mach4 website. Choose the appropriate version for your system and follow the installation instructions. Mach4 is compatible with Windows operating systems and can be installed on any modern PC.
After installation, launch Mach4. The first step is to configure the software to communicate with your CNC machine. Mach4 supports various motion controllers, including Ethernet-based and USB-based devices. Ensure your motion controller is connected to your PC and powered on.
Open Mach4 and navigate to the “Configure” menu, then select “Control” to set up your motion controller. You may need to install specific plugins for your motion controller, which are usually available from the manufacturer’s website. Load the appropriate plugin in Mach4, and the software will recognize your motion controller, allowing you to configure it.
Configuring Mach4
Once your motion controller is set up, the next step is to configure the machine settings. Go to “Configure” > “Mach” to open the main configuration window. Here, you can set up motor tuning, input and output signals, homing, and soft limits.
- Motor Tuning: In the “Motors” tab, configure the steps per unit, velocity, and acceleration for each axis. This ensures that your CNC machine moves accurately and smoothly. You can test motor settings using the “Jog” function in Mach4 to verify the correct movement.
- Input and Output Signals: In the “Inputs” and “Outputs” tabs, map your machine’s physical inputs (like limit switches) and outputs (like spindle control) to the corresponding pins on your motion controller. This is crucial for proper machine operation and safety.
- Homing and Limits: In the “Homing/Limits” tab, set up the homing procedure for each axis. Define the home position, set the soft limits to prevent the machine from moving beyond its physical boundaries, and configure any required homing offsets.
Creating and Running G-code Jobs
Mach4 uses G-code, the standard language for CNC machines, to control machining operations. You can generate G-code files using CAM (Computer-Aided Manufacturing) software or manually write G-code commands. Once you have your G-code file, load it into Mach4 by clicking “File” > “Load G-code”.
Review the toolpath display to ensure the G-code is correct and the toolpath is as expected. Mach4 provides a detailed visualization of the toolpath, helping you identify any potential issues before running the job.
- Homing the Machine: Before starting any job, home your machine to establish a reference point. Use the “Home All” button to move each axis to its home position.
- Setting the Origin: Position the machine at the starting point of your job and set the origin (zero point) for all axes. This is done using the “Zero X”, “Zero Y”, and “Zero Z” buttons in Mach4.
- Running the Job: Click the “Cycle Start” button to begin the machining process. Monitor the machine closely, especially during the first run, to ensure everything is functioning correctly.
Advanced Features and Customization
Mach4 offers extensive customization options, allowing you to tailor the software to your specific needs. You can create custom macros, configure tool change routines, and integrate additional hardware like touch probes and tool setters. Mach4’s LUA scripting engine enables advanced users to automate complex tasks and customize the user interface.
One significant advantage of Mach4 over Mach3 is its modular architecture, which allows for better performance and more reliable operation. This is particularly important for high-speed and complex CNC operations, where precision and stability are critical.
By mastering the Mach4 motion controller, you gain access to a powerful tool that can enhance your CNC machining capabilities. Whether you are upgrading from Mach3 or starting fresh with Mach4, understanding its configuration, G-code operation, and advanced features will enable you to achieve precise and efficient results in your CNC projects.
Conclusion
In the dynamic world of electronics and CNC machining, mastering the tools and technologies at your disposal is essential for achieving precision and efficiency in your projects. This article has provided an in-depth look at four key areas: Arduino driving relay, Mach3 tutorial CNC, PoKeys tutorial, and Mach4 motion controller. Each topic is crucial for building a robust foundation in electronics and CNC control, enabling you to tackle more complex and efficient projects.
Starting with Arduino driving relay, we explored how to control higher power devices using relays. This fundamental skill opens up numerous possibilities for automation, allowing you to manage motors, lights, and other high-power components safely and effectively.
The Mach3 tutorial CNC provided insights into setting up and configuring this popular CNC control software. From installation to running your first job, understanding Mach3’s interface and G-code execution is vital for any CNC enthusiast or professional aiming to optimize their machining processes.
Our PoKeys tutorial showcased the versatility of PoKeys devices in interfacing various inputs and outputs with your computer. Whether you’re adding extra inputs to your CNC machine or building custom control panels, PoKeys devices offer a flexible and powerful solution.
Lastly, the Mach4 motion controller section highlighted the advanced features and capabilities of this software, the successor to Mach3. By learning how to configure and use Mach4, you can enhance your CNC operations with improved performance and greater flexibility.
Together, these tutorials provide a comprehensive guide to some of the most important tools and technologies in electronics and CNC control. Whether you’re a beginner looking to get started or an experienced user seeking to deepen your knowledge, mastering these areas will significantly enhance your capabilities and open up new opportunities for innovation and efficiency in your projects. By integrating Arduino, Mach3, PoKeys, and Mach4 into your workflow, you’ll be well-equipped to handle a wide range of applications, from simple automation tasks to complex CNC machining operations.